November 02, 2020

Earthquake Cake

by , in

This gooey, rich, delicious Earthquake Cake is full of chocolate, pecan, and coconuts and is an explosion of flavor in every bite! Try my Pumpkin Earthquake Cake for a cake with pumpkin and chocolate overload!

Earthquake Cake

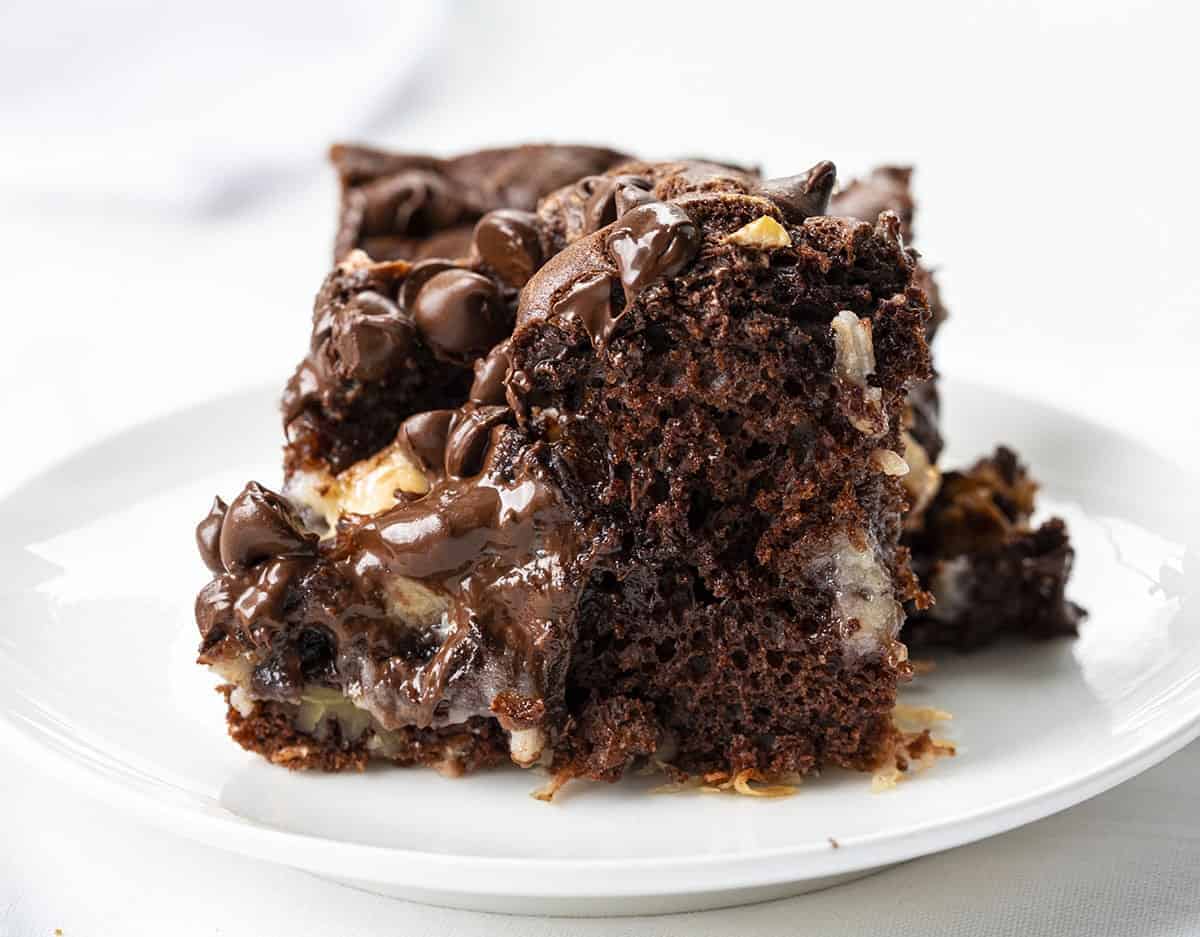
I love a cake that’s instructions are: throw in everything but the kitchen sink. This Earthquake Cake is one of those classic cakes and really lives up to its name! It’s similar to a dump cake… but it gets its name from all the cracks, crevices, and valleys on top when it’s done baking. 

It has gooey tunnels of goodness all around it which are filled with a chocolate and cream cheese surprise! From the outside, it looks just like your normal cake, but with each and every bite you have the addition of the cream cheese mixture, melty chocolate chips, coconut, and pecans!

Piece of Earthquake Cake on White Plate

Earthquake Cake Recipe

With its chocolate overload, this Earthquake Cake is a must make. You have all sorts of flavors with each fork full and you won’t be able to stop yourself from coming back for more!

Ingredients (full recipe below)

  • Chocolate cake mix–Follow the instructions on the box to make the cake batter.
  • Shredded coconut
  • Chopped pecans
  • Cream cheese, room temperature (Let the cream cheese sit out for about 15 minutes.)
  • Butter, melted
  • Confectioners’ sugar
  • Vanilla extract
  • Salt
  • Chocolate chips–You could also substitute white chocolate chips if you prefer. (I think any candy chips you add would be fun and delicious.)
  • Chocolate ice cream (optional)

Raw Ingredients for Earthquake Cake

How to Make an Earthquake Cake

This Earthquake Cake is so easy to make, and just like the name implies, it is bursting with flavor! So, preheat the oven to 350°F, prepare a 9×13-inch pan with non-stick spray, and get out the ingredients you need.

  1. First, prepare the cake mix by following the directions on the box.
  2. Next, sprinkle the shredded coconut and pecans on the bottom of the prepared baking dish.
  3. Pour the cake batter on top of the coconut and pecans. Set aside.
  4. Meanwhile, in a large bowl, combine the cream cheese, melted butter, confectioners’ sugar, vanilla, and salt. Beat with a mixer until combined.
  5. Spread the cream cheese mixture on top of the cake batter.
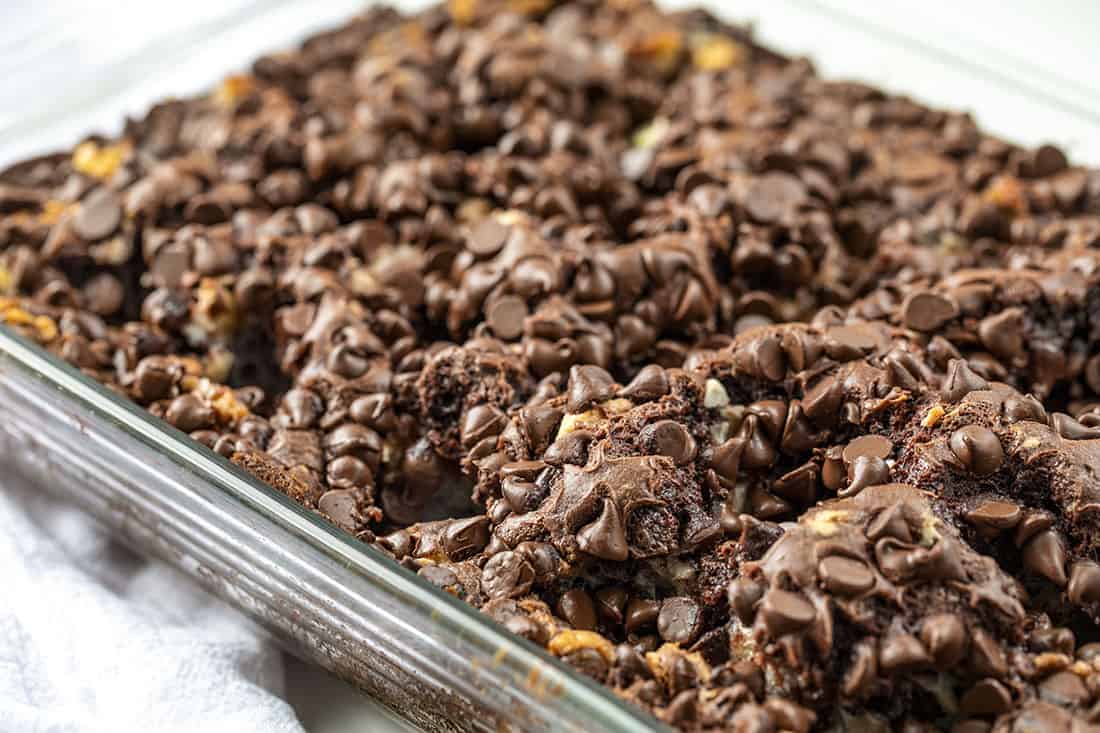
  6. Top with chocolate chips and bake for about 50 minutes, or until the center is set. (To know when the cake is set, give the pan a nudge and make sure the center of the cake doesn’t jiggle.)
  7. Top with chocolate ice cream for the icing, I mean ice cream, on the cake!

Overhead Image of Earthquake Cake in a Pan

Can I Make the Chocolate Cake Mix from Scratch?

Yes! I would recommend using my cake recipe from my Perfect Chocolate Cake recipe. Just mix together the ingredients as you would follow on a box mix. But, of course, don’t bake the cake. You will add the batter to the baking pan to bake with the other layers of the recipe.

Earthquake Cake in Pan with Pieces Removed

Looking for More Cake Recipes?

Brownie Bottom Cheesecake

Snickers Cheesecake Cake

Chocolate Peanut Butter Ooey-Gooey Cake

Dark Chocolate Cake with Buttermilk Pecan Frosting

Earthquake Cake

Gooey, rich, and delicious! This Earthquake Cake is full of chocolate, pecan, and coconuts and is an explosion of flavor with each bite!
Prep Time: 10 minutes
Cook Time: 50 minutes
Total Time: 1 hour
Course: Dessert
Cuisine: American
Keyword: earthquake cake
Servings: 12 people
Calories: 495kcal
Author: Amanda Rettke--iambaker.net

Ingredients

  • 1 box (15.25 ounces) chocolate cake mix, mixed according to package directions
  • 1 cup sweetened shredded coconut
  • 1/2 cup chopped pecans
  • 1 package (8 ounces) cream cheese, softened
  • 1/2 cup (1 stick or 113g) butter, melted
  • 2 1/2 cups (312.5g) confectioners' sugar
  • 1 teaspoon vanilla extract
  • 1/4 teaspoon salt
  • 2 cups semi-sweet chocolate chips
  • chocolate ice cream, optional

Instructions

  • Preheat oven to 350° and grease a 9x13-inch pan with cooking spray.
  • Prepare the cake batter according to package directions.
  • Sprinkle your coconut and pecans onto the bottom of the prepared pan.
  • Spread your cake mix over the top. Set aside.
  • Meanwhile, in a large bowl, combine the cream cheese, butter, confectioners' sugar, vanilla, and salt.
  • Beat with a mixer until combined. Dollop the mixture over the cake, and spread it out.
  • Sprinkle chocolate chips on top and bake for about 50 minutes, or until the center is set.
  • Serve warm with ice cream, if desired.

Nutrition

Calories: 495kcal
Tried this recipe?Let us know how it was!


Easy Earthquake CakeEarthquake Cake


from i am baker https://ift.tt/2fBYqX0
via IFTTT
November 01, 2020

Homemade Glazed Pumpkin Donuts

by , in

Fall has been taken over by pumpkin-spiced everything! Pumpkin-spiced coffee (and pumpkin-spiced creamer), pumpkin-spiced beer, pumpkin-spiced cheesecake! I think we’re forgetting one of the simplest joys of the fall season: glazed pumpkin donuts.

My homemade pumpkin donut recipe is perfect for those crisp fall mornings when you want something warm, spicy, sweet, and (best of all) fried. While I love a good baked donut, sometimes, when the nights get longer, you need a good fried treat to look forward to in the morning! 

I love this pumpkin donut recipe. It has the perfect amount of warm spices, cinnamon, and pumpkin flavoring, and it’s all enveloped in a glaze that hardens just the right amount, that makes the donuts glossy and sweet on the outside. 

This recipe makes it pretty clear why pumpkins make fall the perfect season for baking!

Store-Bought Vs. Homemade Pumpkin Puree 

This recipe does call for pumpkin puree. When making my homemade puree, I use a “sugar pumpkin,” also known as a “pie pumpkin.” They’re the smaller, orange pumpkins you can find at your grocery or farmers market. Other pumpkins can be used, but the flavor and texture may vary. That’s it! To make your own puree, you just need pumpkin!

If you’re not feeling like taking on the gourds, however, store-bought canned pumpkin puree will do! They both work.

A wire rack full of glazed pumpkin donuts.

What Is Pumpkin Pie Spice?

The phrase “pumpkin pie spice” is thrown around a lot, but what does it even mean?! 

Typically, the combination of spices, which can be used in both sweet and savory dishes, are a combination of cinnamon, nutmeg, closed, ginger, and allspice. You can get this pre-mixed in your grocery’s spice aisle, or you can make your own using my homemade pumpkin pie spice recipe!

What You Need To Make Pumpkin Donuts

  • Measuring cups and spoons
  • Mixing bowls
  • Heavy-bottomed pot
  • Thermometer (optional)
  • Baking sheet lined with paper towels or a wire rack.
  • 3-inch (7.5cm) round cutter
  • 1-inch (2.5cm) round cutter

How To Make Pumpkin Donuts

Is there anything more satisfying than pulling a delicious smelling pumpkin donut out of hot oil and glazing it with a delightful vanilla glaze? Yes — eating them! Here’s how you can make pumpkin donuts (and don’t forget to get the full recipe with measurements, on the page down below):

  1. Combine your dry ingredients, flour, sugar, baking powder, pumpkin pie spice, and salt in a large bowl.
  2. In another bowl, whisk together the wet ingredients: pumpkin puree, sour cream, eggs, butter, and vanilla extract.
  3. Combine the wet ingredients with the dry thoroughly to make a dough. Cover the dough and let it chill for 15 minutes in the refrigerator.
  4. In the meantime, prepare your frying space! Into a heavy-bottomed pot, pour 3-inches of oil and set it over medium-high heat. Insert your thermometer if you are using one. Next to the stove, place your baking sheet lined with paper towels or a wire rack. Near the rack, place the bowl with the vanilla glaze
  5. Once the dough has chilled enough to firm up, roll it out onto a floured surface to ½ inch (1.5cm) thick and cut using a 3-inch (7.5cm) round cutter. Reroll the scraps to make more circles. Use a 1-inch (2.5cm) cutter to cut the centers of your dough to make the donut shape.
  6. The oil should be roughly 350°F (180°C). Drop 2 or 3 donuts, or 5-6 donut holes, into the oil at a time. Fry for about 2 to 3 minutes until it is lightly browned on one side, then flip and fry until the other side is browned.
  7. Remove the donuts or holes to a wire rack to drain of oil just a little. Immediately, dip both sides of the hot donuts into the vanilla glaze and then set on the rack to finish drying. Repeat the process with the remaining donuts and holes.

The interior of my glazed pumpkin donut recipe!

Gemma’s Pro Chef Tips For Making Pumpkin Donuts

  • You want to be sure that your oil stays around 350°F (180°C) to ensure the donuts cook properly. Keep in mind that when you add the fresh dough, it will change the temperature. Don’t crowd your pot.
  • Glaze your donuts while they’re hot, so the glaze sets well. 
  • Donuts puff up in oil a lot! Make sure you roll them out no thicker than 1/2 inch.
  • Use my Vanilla Donut Glaze.
  • Don’t have Pumpkin pie spice? Make your own Pumpkin Pie Spice.
  • Make your own Pumpkin Puree.
  • Oil is HOT when frying! Make sure you stay safe: place donuts carefully in the oil to avoid splash burns, watch carefully to make sure that the oil doesn’t start to smoke, and never walk away from oil heating on the stove! If you are a child making this recipe, make sure to get an adult’s help!

How Do I Store Homemade Pumpkin Donuts?

You should enjoy these donuts as soon as they’re cool enough to eat! Donuts are always best when they’re eaten the day they are made, but if you have any leftovers, keep them in an airtight container at room temperature for up to 2 days.

Make More Fall Recipes!

And don’t forget to buy my Bigger Bolder Baking Cookbook!

Full (and printable) recipe below!

A batch of pumpkin donuts cooling on a rack.
Print

Glazed Pumpkin Donuts Recipe

You haven't had a donut until you've had my Glazed Pumpkin Donut recipe — it's perfectly fall, perfectly spiced, and perfectly sweet.
Prep Time 20 minutes
Cook Time 20 minutes
Servings 14 Donuts
Author Gemma Stafford

Ingredients

  • 3 ½ cups (17 ½ oz/497g) all-purpose flour
  • 1 cup (8oz/225g) granulated sugar
  • 4 teaspoons baking powder
  • 2 teaspoons pumpkin pie spice
  • 1 teaspoon salt
  • 1 cup (8oz/225g) pumpkin puree
  • ½ cup (4oz/115g) sour cream
  • 2 large eggs
  • 2 tablespoons (1oz/28g) butter melted
  • 2 teaspoons vanilla extract
  • Vegetable oil for frying (canola, safflower, etc.)
  • 1 recipe Vanilla Donut glaze

Instructions

  • In a large bowl, combine your dry ingredients: flour, sugar, baking powder, pie spice, and salt.
  • In another bowl, whisk your wet ingredients: pumpkin puree, sour cream, eggs, butter, and vanilla extract.
  • Combine the wet and dry ingredients thoroughly to make a dough. Cover the dough and let it chill for 15 minutes in the refrigerator to firm up.
  • Set up your frying space: pour oil to a 3-inch depth in a heavy-bottomed pot and set over medium-high heat and insert a thermometer, if using. Place a baking sheet next to the stove, either lined with paper towels or a wire rack. Place the bowl with the glaze near the rack.
  • On a floured surface, roll out the donut dough to ½ inch (1.5cm) thick and cut using a 3-inch (7.5cm) round cutter, cut circles of dough. You can reroll the scraps to make more circles.
  • Using a 1-inch (2.5cm) cutter, cut holes in the center of your dough circles.
  • When your oil is hot, roughly 350°F (180°C), drop 2 or 3 donuts (or 5-6 holes) at a time in the oil. Fry for about 2 to 3 minutes, until lightly browned on one side, then flip and fry until the other side is browned.
  • Remove to the wire rack and immediately dip both sides of the hot donuts in the vanilla glaze and set on the rack to dry before proceeding with the remaining donuts and holes.
  • Enjoy when just cool enough to devour! Donuts are best eaten the day they are made, but you can store any leftovers in an airtight container at room temperature for up to 2 days.

The post Homemade Glazed Pumpkin Donuts appeared first on Gemma’s Bigger Bolder Baking.


from Gemma’s Bigger Bolder Baking https://ift.tt/3ehbvPi
via IFTTT
November 01, 2020

Vegan Instant Pot Lasagna

by , in

A lasagna can be fairly time-consuming to make, what with making all those different elements that go into it and the layering and baking and so on. But I make it all that much easier for you with my vegan Instant Pot Lasagna. Now you can eat lasagna for a weeknight dinner--or for a special weekend meal with family or friends! And you can make it gluten-free.

Vegan Instant Pot Lasagna with layers of creamy cashew ricotta, vegan parm and shreds of vegan mozzarella and parsley in a steel IP liner with a blue and white kitchen towel.

Jay's a bit of a Garfield, in more ways than one, and one of those ways is his love for lasagna.

I don't think he's ever met a lasagna he doesn't like, and he loves my traditional vegan lasagna something fierce. So to keep my baby cat well-fed, I came up with this quick version of a lasagna that's made in an Instant Pot. A Vegan Instant Pot Lasagna.

This is not an approximation of a lasagna made in an IP with free-floating noodles -- it's a lasagna proper, layered and cheesy and filled with the tomato-ey goodness of my easy homemade marinara (although you can definitely use storebought).

I pretty much made this the way I make a traditional vegan lasagna, except that this time, when I had Desi photograph it, I used gluten-free lasagna noodles. It works just as well with regular lasagna noodles.

I wanted this recipe to be fuss-free so I didn't make it inside a springform pan or anything like that--I just cooked it up directly in the IP liner, and it worked fine. The only downside of this is that you can't quite slice it as neatly but who cares about that when it tastes SO good.

A slice of Vegan Instant Pot Lasagna with layers of creamy cashew ricotta, vegan parm and shreds of vegan mozzarella and parsley in a wide black bowl with a fork and a green napkin.

What we love about this lasagna

  • It's a lasagna! Except it is made in an Instant Pot, so it's easier. But it tastes as delicious as any lasagna you will ever make.
  • It's hearty.
  • It's cheesy.
  • It pops with delicious tomato flavor from the marinara.
  • It takes minutes to assemble.
  • You don't have to make it all from scratch. Use storebought marinara and just make the cashew ricotta at home--and the vegan parmesan. Both literally take minutes to make, but you can always make them in advance.
  • It bakes in the IP from start to finish in about half the time it'd take to bake a lasagna in the oven.

Tips and steps for making the best Vegan Instant Pot Lasagna

  • If you have some time, make my five-ingredient homemade vegan marinara sauce. It's super easy and it's better than anything you can find on a store shelf. You can make it a couple of days ahead and refrigerate it.
  • Same thing with the cashew parmesan and the vegan ricotta. You can stir them up in minutes, but you can also just make them in advance when you have a little time to kill. Then you're all set to make your lasagna whenever you feel like it (that sentence just made me feel so warm and cozy inside! Lasagna + whenever = heaven)
  • I use oven-ready lasagna noodles for this lasagna, and I advise dipping them in cold water for about a minute before layering them. This is a small extra step but it will guarantee your lasagna noodles come out tender and nicely cooked when you actually eat the lasagna.
  • I like mixing some meatless meat into the marinara sauce for a protein boost. If you like a lentil marinara, use lentils instead.
  • I just thaw the meatless meat, mix it with the marinara, and then layer it all on. Or you can brown the meatless meat in the IP first (in a tiny bit of oil), add the marinara, heat it all together, then remove most of the marinara and start layering.
  • Ok, so here goes. Add a couple of ladles of the marinara into the IP liner, then add a cup of vegetable stock (or water). Layer on four lasagna noodles -- place two noodles side by side in the IP liner, then place two more noodles criss-crossing them.
  • Add a fourth of the marinara, a fourth of the vegan parm, a fourth of the cashew ricotta, and a fourth of the vegan mozzarella shreds (I used Daiya). Once again layer on four noodles--two side by side, then two more criss-crossing them, and proceed with layering on the other ingredients. You should have four layers and use 16 noodles in all, which is the number you'll usually get in a box.
  • Finish up with a final layer of marinara, parmesan and ricotta but don't sprinkle on that final layer of vegan mozz yet. Add that only after your lasagna is cooked and you've released the pressure from the IP. Sprinkle on the mozzarella and cover with the lid and let stand another 10 minutes. Beautiful lasagna. Guaranteed.
Vegan Instant Pot Lasagna with layers of creamy cashew ricotta, vegan parm and shreds of vegan mozzarella and parsley in a steel IP liner with a blue and white kitchen towel.

Making your vegan lasagna gluten-free

  • Noodles: I made this lasagna gf this time, and I used Barilla's oven-ready lasagna noodles which are vegan.
  • If you use a meatless beef, make sure you buy one that is labeled gf. I usually use Beyond Beef, which is both gf and soy-free. Impossible's meatless pork and sausage are also glutenfree.
  • You can also use brown lentils in your lasagna instead of meatless meat. Add 2 15 oz cans of brown lentils for this recipe. Drain them and stir them into the marinara just as you would the "meat."
A slice of Vegan Instant Pot Lasagna with layers of creamy cashew ricotta, vegan parm and shreds of vegan mozzarella and parsley in a wide black bowl with a fork and a green napkin.
Vegan Instant Pot Lasagna with layers of creamy cashew ricotta, vegan parm and shreds of vegan mozzarella and parsley in a steel IP liner with a blue and white kitchen towel.
Vegan Instant Pot Lasagna with layers of marinara, ricotta, parmesan and mozzarella in an Instant Pot liner with parsley sprinkled on top and next to a blue and white kitchen towel.
Print

Vegan Instant Pot Lasagna

This vegan Instant Pot Lasagna makes it that much easier to make your favorite pasta dish. Layers of lasagna noodles sandwich a creamy cashew ricotta and a flavorful marinara. Now you can eat lasagna for a weeknight dinner--or for a special weekend meal with family or friends! And you can make it gluten-free.
Course Main Course
Cuisine Italian, Vegan
Diet Diabetic, Hindu, Low Calorie, Low Fat, Low Lactose, Low Salt, Vegan, Vegetarian
Prep Time 30 minutes
Cook Time 10 minutes
Time for IP to reach and release pressure (approx) 20 minutes
Total Time 1 hour
Servings 8 servings
Calories 437kcal

Ingredients

For the cashew ricotta:

Instructions

  • Make the cashew ricotta, by placing the cashews in a food processor with all ingredients except the parsley. Process for a couple of minutes until fairly smooth. Mix in the parsley and pulse until it's mixed into the rest of the ricotta. Set aside.
  • Keep a pan of warm water handy to soak the noodles just before you layer them.
  • Mix your marinara with the meatless meat or lentils. It might be easier to do this if you heat the marinara a bit, and you can just do this in the IP. Set the IP to the saute function. Place the liner inside, add the marinara, the meatless meat or lentils and the oregano, and mix well and let it all come to a boil. You can also do this on the stovetop. Make sure your marinara is seasoned to your liking and add some salt and pepper if you need to.
  • As soon as the sauce comes to a boil you can turn off the saute function. Remove most of the sauce from the liner using a ladle, leaving just about ¼ cup inside. Add a cup of water to the sauce that remains inside.
  • Soak the lasagna noodles in the pan of warm water for a minute. Layer on four noodles into the bottom of the pan by placing two noodles side by side and two more on top, crisscrossing them. Since your IP liner is round and your noodles are rectangular, you are not going to get a perfect fit, but that's fine. The space on the sides is going to let the sauce bubble up and cook everything nicely.
  • Layer on one-fourth of the meat sauce over the lasagna noodles. 
  • Layer on one-fourth of the cashew parmesan.
  • Layer on one-fourth of the vegan ricotta.
  • Layer on one-fourth of the vegan mozzarella.
  • Repeat until you have built up three layers of the meat sauce and the cheeses. Over the fourth and final layer, layer the remaining meat sauce and parm and ricotta. Don't add the remaining mozzarella shreds.
  • Cover the Instant Pot with the lid, then set to the manual pressure cooking function for 12 minutes.
  • Let the pressure release naturally or force-release it 10 minutes after the end of cooking. Sprinkle on the remaining mozzarella and cover the lid and let it stand for another 10 minutes.
  • The longer you let it stand, the more the lasagna sauce will thicken up, so I recommend leaving it alone for at least 15-20 more minutes. But if you simply can't wait, cut it, scoop it out and dig in!

Nutrition

Calories: 437kcal | Carbohydrates: 22g | Protein: 18g | Fat: 32g | Saturated Fat: 2g | Potassium: 175mg | Fiber: 2g | Sugar: 3g | Vitamin A: 267IU | Vitamin C: 3mg | Calcium: 16mg | Iron: 2mg

The post Vegan Instant Pot Lasagna appeared first on Holy Cow! Vegan Recipes.


from Holy Cow! Vegan Recipes https://ift.tt/2JiCy1c
November 01, 2020

Baked Sweet and Sour Chicken

by , in

Baked Sweet and Sour Chicken is 1000x better than any takeout! It’s crispy on the outside, tender juicy on the inside and exploding with flavor. There is a reason why this is our favorite recipe on the blog!

This meal is going to blow your family away! We love to complete this meal with this dishes like Homemade Egg Rolls, Cream Cheese Wontons or Easy Fried Rice.

Juicy, tender Baked Sweet and Sour Chicken on top of rice.

Sweet and Sour Chicken

I am going to keep this as short and simple as possible…you NEED to make this Sweet and Sour Chicken recipe. This recipe is number one for a reason, it’s absolutely incredible. We have yet to find any takeout restaurant beat this recipe.

The secret to the breading is the cornstarch, it makes such a huge difference and the flavor of the sauce is unbeatable. It will thicken as it cooks, coating the chicken perfectly. It’s also easy enough that you just might have to add this to your menu every week, it’s just that good! Easy take out at home!

Chinese Sweet and Sour Chicken Ingredients

Amazing restaurant quality sweet and sour chicken that you can make from home!

  • Chicken Breasts: Use boneless, skinless chicken breasts for easy prep.
  • Salt and Pepper: To taste
  • Cornstarch:Creates a superb crunch
  • Eggs: Well beaten to help the coating stick.
  • Canola Oil: Just enough to give the chicken a quick fry for crispness.
  • Sugar: It wouldn’t be sweet without the sugar
  • Ketchup: Classic ingredient in the sauce
  • White Vinegar and Apple Cider Vinegar: I like the combination of both.
  • Soy Sauce: Sweet and sour wouldn’t have that classic flavor without the soy sauce
  • Garlic Salt: Adds the perfect punch of flavor.

How to Make Sweet and Sour Chicken

  1. Prep: Preheat oven to 325 degrees. Cut your chicken breasts into bite sized pieces and season with salt and pepper.
  2. Dip: In separate bowls, place the cornstarch and slightly beaten eggs. Dip the chicken FIRST in the cornstarch and then coat in the egg mixture.
  3. Flash Fry: Heat canola oil in a large skillet over medium high heat and cook chicken until brown but not fully cooked throughout. Place the chicken in a 9×13 inch dish.
  4. Sauce: In a medium sized mixing cowl, combine sugar, ketchup, apple cider vinegar, white vinegar, soy sauce and garlic salt.
  5. Bake: Pour over the chicken and bake for an hour. Stir every 15 minutes to coat them in the sauce.

Preparing juicy tender baked sweet and sour chicken.

Trust Me on these Tips

  1. Method to the Madness: Make sure you first coat your chicken in the cornstarch and then the egg. This method makes the perfect breading for the chicken.
  2. Fast: Do not cook the chicken all the way through before baking. You just want to get the chicken lightly brown on the outside, and then it bakes to perfection.
  3. Low and Slow: Baking the chicken at a low temperature will not over cook the chicken. This helps to cook the chicken all the way through and thicken up the sauce.

Frying the coating on Baked Sweet and Sour Chicken.

Easy Sweet and Sour Chicken Tips

  • Vinegar: You can use all Apple Cider Vinegar, but I wouldn’t use all White Vinegar, the flavor and zing will be different.
  • Substitute: If you want a lighter vinegar flavor try Rice Vinegar, it’s still tangy but a little milder.
  • Chicken: Cut the Chicken into even bite sized pieces so it’ll cook evenly. Using thighs might result in uneven cooking as light and dark meat cook differently.
  • Pork: This recipe would also work perfectly with pork.
  • Saucey:  If you like your dish saucey, double the sauce recipe and place half on the chicken and another half on the stove in a pot at a simmer for 8-10 min till thickened.
  • Veggies: Feel free to add vegetables or even pineapple to the dish before baking.

Golden juicy, tender Baked Sweet and Sour Chicken.

Storing Leftovers

  • Fridge: Place leftovers in an airtight container in the fridge for up to 3-4 days.
  • Freezer: This can be frozen too. Just place in a freezer safe container or bag and freeze for up to 3 months.
  • Reheat: Sweet and Sour Chicken is best reheated on the stove. Reheating it in the microwave can make the chicken rubbery and overcooked. Place leftovers in pan on the stove top and heat on medium heat, stirring often, till heated through.

Crispy, juicy, tender Baked Sweet and Sour Chicken.

More Amazingly Delicious Baked Chicken Dishes

Print

Baked Sweet and Sour Chicken

Baked Sweet and Sour Chicken is 1000x better than any takeout! It's crispy on the outside, tender juicy on the inside and exploding with flavor. There is a reason why this is our favorite recipe on the blog! 
Course Main Course
Cuisine American, Asian American
Keyword baked sweet and sour chicken, sweet and sour chicken
Prep Time 20 minutes
Cook Time 1 hour
Total Time 1 hour 20 minutes
Servings 6 people
Calories 553kcal
Author Alyssa Rivers

Equipment

  • Utopia Kitchen Cooking Knives
  • Fine dine Mixing Bowls

Ingredients

  • 4 Chicken breasts boneless, skinless chicken breasts
  • Salt and pepper to taste
  • 1 1/2 cup cornstarch
  • 3 eggs beaten
  • 1/4 cup canola oil
  • 1 cup granulated sugar
  • 4 tablespoons ketchup
  • 1/4 cup white vinegar
  • 1/4 cup apple cider vinegar
  • 1 tablespoon low sodium soy sauce
  • 1 teaspoon garlic salt

Instructions

  • Preheat oven to 325 degrees. Cut chicken breasts into bite-sized pieces and season with salt and pepper.
  • In separate bowls, place cornstarch and slightly beaten eggs. Dip chicken into cornstarch then coat in egg mixture.
  • Heat canola oil in a large skillet over medium-high heat and cook chicken until browned. Place the chicken in a 9 x 13 greased baking dish.
  • In a medium sized mixing bowl, combine sugar, ketchup, apple cider vinegar, white vinegar, soy sauce, and garlic salt. Pour over chicken and bake for 1 hour.
  • I stirred the chicken every 15 minutes so that it coated them in the sauce.

Video

Notes

Updated on November 1, 2020 
Originally Posted on July 4, 2013

Nutrition

Calories: 553kcal | Carbohydrates: 66g | Protein: 35g | Fat: 15g | Saturated Fat: 2g | Cholesterol: 178mg | Sodium: 777mg | Potassium: 627mg | Fiber: 1g | Sugar: 36g | Vitamin A: 215IU | Vitamin C: 2mg | Calcium: 20mg | Iron: 1mg


Save


from The Recipe Critic https://ift.tt/35SDbX1
via IFTTT